We are headed into a very busy time of year. This also happens to be a great time to stock up on a lot of things for food storage. Many stores are running sales on canned vegetables (Fry's for $0.33 this week!), evaporated milk (also on sale at Fry's), flour (Albertson's & Basha's for $0.99), and many other items that store well. I personally adore brown sugar, and store it in my large freezer to keep it soft. This is the time of year to buy it because in a couple of weeks, it should be fairly inexpensive.
So no matter how busy you are, you still have to eat, and most likely grocery shop. When you do, at least glance at the ads that are next to the grocery store doors when you go in, and see if there is an item or two you can buy to add to your food storage. This is a good thing to do all year, but right now it might be the only thing you can do for food storage...but at least it is something, and keeps you moving in your food storage journey!
Wednesday, November 10, 2010
Tuesday, August 17, 2010
Noticing the "Best By" Date
One of the best ways to get the most food storage bang for your buck is to notice details. If you have invested the time to shop the sales, it is a real tragedy to buy a bunch of an item and then realize as you are putting away that it will expire three months later. Or maybe you won't even notice the date on it until you go to get it out, and it has changed color and just doesn't look right. Most canned food doesn't have an "expiration" date, but rather a "best by" date. Instead of this date being a hard and fast rule, it is a guideline. Your spaghetti sauce will probably still be good a month after its best by date (provided it looks and smells right - when in doubt, throw it out!), but how frustrating it is to have 20 bottles of spaghetti sauce all right at their best by date. The easiest way I have found to handle this issue is to take a couple of seconds at the store and check the best by date. If I'm not happy with it, I will check another flavor or variety. Often by just taking a couple of seconds, I can find a product with a best by date that suits my needs.
And as always, make sure you are rotating your food storage!
And as always, make sure you are rotating your food storage!
Thursday, July 29, 2010
Homemade Laundry Detergent
This post was originally posted on my own blog, and I have made this several times. I am very pleased with how well it works, and thought I would share. If you are interested in making a liquid/gel version, be sure to check out the original and follow-up posts over at Simple Dollar (links found in the next paragraph).
Several months ago, I came across a post by Trent at Simple Dollar about his experiment of making homemade laundry detergent. It is one of his most popular posts ever, with over 500 comments, and he has written a follow-up post with 240 comments that is complete with pictures and detailed instructions.
I decided I didn't want to make a 5 gallon bucket's worth of laundry detergent because I don't have a place to store it. Also, I was curious as to how well it would work. So, I read all of the comments (yes, all 520 of them), and came up with a powdered version that I store in a 6 qt. container that I already had on hand. I was so please with the results that this morning I made a double batch that fits in the container just perfectly.
Having gone through a whole batch, I can tell you that I really like it. Not only is it cheaper than store bought detergent (even with a sale and coupon), but there are specific things I like such as a) my clothes don't smell like anything! This is great, especially with our allergies. I don't have this need to smell like a Mountain Meadow or a Lilac Breeze. And to me, not smelling like anything smells clean. Now, if I really wanted a scent, then I could easily add a drop - two at the most - of an essential oil to the water right after I add the detergent and before I add the clothes. b) it works well, just as well in my opinion as any store bought detergent. For typical loads, I use 2 heaping tablespoons, but if I am washing anything muddy or unusually dirty, I use 3 heaping tablespoons. That's it! c) I know exactly what is in it. This isn't a huge deal to me, but I do take comfort in knowing that I know the ingredients. It does bug me just a little bit that manufacturers don't tell you want is in there cleaning products. d) Price: so here's the break down. I can't get an exact estimate on how much it costs me to make because I already had the Zote bar soap on hand, as well as a HUGE tub of baking soda. However, since neither of these ingredient are necessary (you can use just about any bar of soap. Trent at Simple Dollar uses whatever cheap soap he has on hand. Lots of people recommend Ivory, especially if sensitive skin is an issue, and you can leave out the baking soda if you want, though I do like it), I didn't worry too much about them. I figure it is about $5 for a double batch, which is enough to wash 120 large loads of laundry. This makes it about $0.042 per load. I can usually get a 32 load container of Purex for $1.99 with a sale and coupon. This makes it $0.0625 per load. However, that is for regular loads of laundry. The last time I did a regular sized load of laundry was probably when I was away at college. In my experience, I only get about 25 loads out of the 32 load bottle. That makes Purex $0.08 per load.
A couple of notes: According to what I have read, the soaps that seem to work best are any type of "laundry bar soap" such as Zote (which you can get at the $0.99 Store - I bought mine at Target a few years ago because it is awesome for getting stains out) or Ivory. Also, you don't have to include the baking soda, but I do because it deodorizes the clothes, and also seems to help with our very, very hard Arizona water. Because we do have such hard water, I use vinegar in a Downy ball. This helps all of the soap rinse out of the clothes so that your whites don't get dingy. Also, it acts as a fabric softer so I don't have to use a dryer sheet or liquid fabric softener. I was skeptical when I first read this tip, but it really works that there is no lingering vinegar smell at all. I use my Grater attachment for my Bosch to grate the soap. You can do it on the small holes of a box grater, but it's kind of hard.
I get the Borax at Target, and the Washing Soda at Fry's Marketplace (though I have heard that Basha's may also carry it).
Laundry Detergent
(powdered version - about 60 large loads)
3 C. Arm & Hammer Washing Soda (exactly half of a 55 oz. box)
3 C. Mule Team Borax
1 1/2 C. Baking Soda
1 (14 oz.) Bar Zote Laundry Bar Soap, finely grated
Mix everything well in a large container with a lid.
Use 2 heaping tablespoons for a large load - 3 tablespoons if the clothes are really soiled. Start the washer on hot, add the detergent, and let it dissolve for 2 or 3 seconds. Change water temperature to cold (or desired setting). Fill a Downy Ball to the top line (x-large line) with vinegar and add it to the wash on top of the clothes.
You can add a drop or two of essential oil to the water after adding the soap, before adding the clothes if you want a light scent.
Tuesday, July 13, 2010
Water: Final Thoughts
Water is important. It can be a little daunting to begin storing water, but you need to start somewhere. Here are two more suggestions for water storage that I have not used, but they may work for your family and situation. As always, if you have questions or need help with any aspect of food storage, please contact Rebecca Wilcox, or a member of the Canning Committee.
1) Refill sturdy, plastic containers that once held a drinkable liquid with water . It is very important that the containers are both a) sturdy (don't reuse milk jugs or wimpy juice containers) with a good lid and b) held a liquid that was meant to be drunk. The containers I have seen used most often are two-liter soda pop bottles. Make sure to rotate these frequently. For more information, visit providentliving.org.
2) Freeze water. If your freezer is not very full (a category I definitely don't fit into!), then filling containers with water and placing them in your freezer will not only help your freezer run more efficiently, but that water can be part of your water storage. Again, make sure to rotate.
As always, if you have questions or need help with any aspect of food storage, please contact Rebecca Wilcox, or a member of the Canning Committee.
Tuesday, July 6, 2010
Water - Parts 3 & 4
You can read the other pieces of this Water Storage Series here and here.
We rotate our longer-term supply of water about every six months. There are two components to it, comprising the third and fourth aspects of our water storage plan. First, we store water in 5-gallon, heavy-duty, square, very thick, blue containers. They are composed of the same material that the big blue 55-gallon drums are. At the same time that I bought the containers, I bought a spigot that fits into the cap so that if necessary, we could use the containers as-is instead of needing to transfer the water to something else in order to be able to fill up a cup. For simply rotating, I don't use the spigot because once you put it into the cap, you will need to get a new cap when you refill the container.
As part of our longer-term water supply, we also have a big, blue, 55-gallon drum. We store it up on a pallet on our back porch. In order to get water out of it, it is necessary to have a siphon. I hope to never have to drink the water in it, but we could if we had to. I store it to use for other water needs such as doing dishes, laundry, and flushing toilets.
It is important to remember to rotate your longer-term supply of water regularly. We rotate ours on General Conference weekends because it is easy to remember. You can also rotate in January and July, or any six-month interval that works for you.
Up next week: other ideas for storing water.
Tuesday, June 29, 2010
Water - Part 2
Today is the second in a series about water. You can find the first part here.
As I mentioned last week, the first part of my water storage is cases of bottled water. Because these bottles are typically made of thinner plastic, we rotate them frequently.
The second part of my master water plan is 3-gallon heavy duty bottles. These are the types of bottles that you would expect to use in a water cooler (however, we don't). They are thick, sturdy plastic with a white cap. I have purchased them from both a Water & Ice type store, and I have found them at Basha's. I originally chose 3-gallon bottles as opposed to 5-gallon bottles because I can heft and handle one of these bottles. The 5-gallon bottles, however, are too unwieldy for me to handle comfortably.
We currently have 12 of these bottles that we rotate through. Whenever we get down to only having about half of them fully, Johnny will go to a water place and fill the empty ones up. You could easily use tap water to fill them up, too. To facilitate rotation, we keep a container in our refrigerator that has a spigot, and fill it up as needed using these 3-gallon bottles. Right now, because it is so hot outside, we are filling up the container nearly each evening, which equates to rotating our entire supply approximately every two weeks.
The two biggest challenges I have encountered with this part of our water storage is first, where to store the bottles, and second, keeping track of when they were filled. Both were easily solved. We store our bottles in the laundry room. When Johnny built me a wonderful set of shelves last year, I specifically designed them to be tall enough that two cases of bottle water will stack on top of each other underneath the bottom shelf. This is also the perfect height for the bottles. That solved our "where to put them" problem. As far as dating them, you can use a crayon to write the date on the white plastic cap. When you use that bottle, wipe the date off using a Magic Eraser sponge.
Next week, I'll write about the two parts of my water storage that deal with storing water for 6-months at a time. If you have any ideas or suggestions on what has worked for your families, please share them!
Wednesday, June 23, 2010
Home Made Spagetti Sauce
I am a little picky on my spaghetti sauce. It has been difficult for me to find a spaghetti sauce I like that is a reasonable price to purchase for food storage. I recently came across this recipe and have used it several times. I love it. It is simple, healthy, and home made with items that could be in your food storage.
The recipe has two parts to it. The first is a dry mix that you could have premeasured and in individual bags for added convenience.
Spaghetti Seasoning Mix:
1 T minced onion (I have used chopped and it worked fine.)
1 T parsley flakes
1 T cornstarch (I leave this out it keeps it a little more saucy and not as thick)
1 T salt
¼ t instant minced garlic
1 t sugar
1 T dried green pepper (I don’t have this in my food storage so haven’t made the recipe with it yet. I am sure it tastes great though)
¼ t basil
¼ t thyme
¼ t sage
¼ t marjoram
¼ t oregano
Spaghetti Sauce:
2 lb of ground beef
2 16 oz cans tomatoes
2 6 oz cans tomato paste
2 4 oz cans mushrooms (never put this in I don’t like mushrooms)
3 T of seasoning mix (I just put all the
Brown ground beef and add all ingredients. Simmer 30 minutes.
I have made it with a few variations. For example; I have not used meat yet. I have added 1 pint jar of pinto beans, which was pretty good. I don’t have thyme or marjoram in my spice cabinet yet so I haven’t made it using those two spices yet, however the flavor is great.
Also I use diced tomatoes and my cans are 14.5 oz. If you are worried about your family not enjoying the tomato bites, just throw the tomatoes in the blender or food processor first. If I make the recipe as is, our family of 3 only uses half. I put the leftovers in a freezer container and keep it for days that I don’t want to be cooking. You could probably make a double batch to get the same effect.
Bottom line, TRY IT. It is a fast recipe, if it wasn’t it would not be in my collection of favorites.
Happy cooking!
Tuesday, June 22, 2010
Water - Introduction & Part 1
Just a reminder: The Food Storage 101 class is THIS SATURDAY!!!
There are so many important components to Food Storage. One that is often neglected is water. Speaking from my own experience, I put off having water as a part of my Food Storage for a while. I'm not sure why it was so hard for me, but it was. Maybe it was because I don't buy soda pop in 2-liter bottles, except at Christmas time, and then the bottles are already earmarked for our annual Day-After-Christmas Bottle Rocket contest. Maybe it was that the thought of actually having to drink the six-month-old water that has been sitting in the 55-gallon drum on my back porch suddenly made me feel not very thirsty. Maybe it was because the first time I tried storing water, one of the containers sprung a link, and I didn't know it until it had made a big mess. Whatever the reasons, water was my food storage hang-up. I just didn't understand how important water truly is. In the All is Safely Gathered In pamphlet that is published by the Church, water is listed as the second thing you need to focus on, right after your Three-Month Supply, and two steps ahead of building a Longer-Term Supply! Water is so important!
Now, my water storage system has four parts. I rotate each part on a regular basis. This accomplishes two things. First, it keeps the water tasting as good as possible. Second, if there is a problem, such as a leak, it is detected before a lot of damage can be done. A few years ago when I discovered my leaky water container, I called my mom to warn her, knowing that she had purchased the exact same product I had. Sure enough, hers had leaked, too. I was more fortunate than she was. Only one of my containers leaked, and though it made a mess, there was no damage to anything, as I caught it early. Evidently, two of her containers had been leaking, and for a longer time, causing damage to the drywall. This experience reiterated the importance of regularly rotating your water so that minor problems don't turn into larger ones.
The first part of my personal water storage system is very, very easy. It's simply plastic water bottles. Whenever the 24-pack cases of water go on sale (ideally for $1.99, but $2.50 is a decent price if I am running low), I buy them. I have a spot in my laundry room that is easily accessible, and that allows not only for easy rotation, but also lets me keep an eye on things so that I can spot a leak soon after it occurs. Because these bottles are thin, they are the most susceptible of the four methods I use for storing water to leaking. However, I have never had a single one leak, probably because I am careful about where and how I store them, and rotate them regularly. The individual bottles prove to be especially convenient in the summer for grabbing quickly on our way out the door. This helps a lot with rotation, too. My sister also uses this idea as a part of her water storage strategy, and has had a lot of success with it as well.
To make rotation easier, I use a permanent marker to mark each case of water with the expiration date that is stamped on the individual bottles. I write the month and year fairly largely on the outside plastic, and then I stack them so that the case with the nearest date gets used first. Whenever I buy new cases of water, I put them behind or underneath the older ones. This is the same method I use for all of my food storage. Taking the few extra seconds to do this as you putting things way really helps to make rotation easier.
In the coming weeks, I will be sharing the other parts of my water storage system. If you have any ideas or suggestions on what has worked for your family, please share them!
Additional information from the Church on storing water: Water
Wednesday, June 9, 2010
Aunt Norma's Whole Wheat Waffle Mix
My great-aunt Norma was one of my most favorite people. She was amazing at so many things. She always said that these waffles should be served when "there is just a nip of Fall in the air". Though Fall is a long way off from our 110° Arizona Summer days, my dad is getting a fancy waffle iron for Father's Day (his request) from my sisters and I, and I'm also making up a batch of this mix to go with it.
Aunt Norma's Whole Wheat Waffle Mix
Combine the following, and store in an airtight container in the freezer:
10 C. Whole Wheat Flour
4 C. AP White Flour
1/2 C. Sugar
1/2 C. Baking Powder
2 C. Powdered Milk
4 tsp. Salt
To make waffles for 6-8 people, mix:
4 C. Dry Waffle Mix
4 Eggs, lightly beaten
1/2 C. Oil
3 1/2 C. Water
Whisk together well, and bake in a ready waffle iron.
Wednesday, June 2, 2010
Counsel from President Hinckley
Gordon B. Hinckley, “To Men of the Priesthood,” Ensign, Nov 2002, 56
I wish to urge again the importance of self-reliance on the part of every individual Church member and family.
I wish to urge again the importance of self-reliance on the part of every individual Church member and family.
None of us knows when a catastrophe might strike. Sickness, injury, unemployment may affect any of us.
We have a great welfare program with facilities for such things as grain storage in various areas. It is important that we do this. But the best place to have some food set aside is within our homes, together with a little money in savings. The best welfare program is our own welfare program. Five or six cans of wheat in the home are better than a bushel in the welfare granary.
I do not predict any impending disaster. I hope that there will not be one. But prudence should govern our lives. Everyone who owns a home recognizes the need for fire insurance. We hope and pray that there will never be a fire. Nevertheless, we pay for insurance to cover such a catastrophe, should it occur.
We ought to do the same with reference to family welfare.
We can begin ever so modestly. We can begin with a one week’s food supply and gradually build it to a month, and then to three months. I am speaking now of food to cover basic needs. As all of you recognize, this counsel is not new. But I fear that so many feel that a long-term food supply is so far beyond their reach that they make no effort at all.
Begin in a small way, my brethren, and gradually build toward a reasonable objective. Save a little money regularly, and you will be surprised how it accumulates.
Get out of debt and rid yourself of the terrible bondage that debt brings.
Tuesday, May 25, 2010
5 Tips That Have Worked for Me
This is a list of hints and tips that I have found to be helpful as I have worked to create a Three-Month Supply for my family.
- At the very beginning, start by buying just one extra item during each grocery trip. It could be a box of spaghetti, a box of salt, or even a bag of shredded cheese to put in your freezer. The point is to be conscious of trying to build up your Three-Month Supply because it leads to the next step.
- Buy multiple items for your Three-Month Supply when they are on-sale. It doesn't take very much time to glance through the grocery ads each week. If you are really pressed for time, or find yourself at the grocery store without having looked at the ads, grab an ad right by the entrance of the store and just look at the front page. Stores will typically put their best sales on the front page of their weekly ad. When an item that your family likes goes on sale, instead of buying just one or two, buy four or five for the same price.
- If you have a freezer, don't forget that it can be used as part of your Three-Month and Longer-Term Supplies. Many of the meals that my family likes use shredded cheese. I probably could make the recipes without it, but I know that my family is much more likely to eat those meals if cheese is included. Therefore, I keep shredded cheese in my freezer.
- Be wise about what you store, and don't buy things, even on sale, that your family won't eat. No matter how inexpensive an item is, it is a waste of money if you end up having to throw it out because your family refuses to eat it.
- Preserve produce when possible. When you are able to grow your own fruits and vegetables, or to buy them for a great price, can or freeze the extra. For example, in January when my lemons were ready, I froze a lot of the lemon juice so that I can use it in recipes throughout the year. A few weeks ago, I was able to buy strawberries for $0.33 per pound. They were wonderful, and I made freezer jam out of several pounds and froze many more pounds. I am going to pick peaches this afternoon at my parents' house, and plan to make peach jam out of them. A great preserving website is the National Center for Home Food Preservation.
- Be prayerful about your food storage. You are working to keep a commandment, and you will be blessed!
Monday, May 17, 2010
Three-Month Supply Back-up Plan
There are many reasons to have a good Three-Month Supply of food as a part of your food storage. First, it is a commandment. Second, it will be a blessing during hard times. Third, it can be incredibly convenient when life doesn't go as planned. I was reminded of this third reason Sunday.
Saturday evening, I looked at my monthly menu plan and saw that I had planned Grilled Chicken for Sunday dinner. I got the chicken out of the freezer, and put it in the refrigerator to thaw. Sunday, after getting home from Stake Conference, I went to get the chicken out of the refrigerator to marinate it, only to discover that it was still frozen; very frozen to be specific. This has happened before, and you would think that I would have learned to get chicken out of the freezer two days ahead, but I haven't yet. So there I was, standing in the kitchen with a package of totally frozen chicken breasts and a very hungry family anxiously wondering when Sunday Dinner would be ready. I had to come up with a Plan B, and I had to come up with it quick. After evaluating the pantry for a minute or two, I gave everyone their choices: pasta or Indian Fry Bread. Fry Bread won. I mixed up the dough, and while it rested for a few minutes, I got a jar of pinto beans, a jar of beef chunks, and a new bottle of canola oil to refill my small bottle out of the pantry. I heated the beans, and then the beef, in the microwave while the Fry Bread was cooking, and soon dinner was on the table. Not only were the ingredients for the Fry Bread, as well as the beans, beef, and canola oil from my Three-Month Supply, but so was the salsa and the shredded cheese (which I keep in the freezer). The sour cream was nice to have, but was not a necessity. The meal would have tasted just fine without it.
What's the point? The point is that if you store foods that are familiar to you and that your family eats on a regular basis, then when dinner doesn't go the way you planned, you can still put a great meal on the table that your family will love. So tonight, we will have chicken for dinner, and I will continue to rotate and add to my Three-Month Supply so that when I again find myself in a dinner bind - and I'm sure I will, sooner rather than later - I will have options available. And if the chicken still isn't thawed, then we will be having Spaghetti!
Tuesday, May 11, 2010
Storage Container Options
As we are talking about powdered milk, our Food Storage Item of the Month, it is the perfect time to discuss what options there are for containers to hold your food storage.
First, there is the original packaging. Many of the items that you will rotate regularly through your Three-Month Supply can be left in their original packages and containers. This includes things like dried pasta, cereal, and frozen vegetables. Typically, a "best by" date can be found on the outside of the packaging, and is useful in helping you to use up each product while it will still taste the best. It is always important to use up oldest items and ingredients first before opening a newer item, but it is especially necessary when using and rotating items that have been left in their original packaging. I recently discovered a package of frozen vegetables that had found it's way to the bottom of my chest freezer. It's best by date was six months previous and there was a very small hole in the bag. When I opened the package, it was full of ice and the vegetables were shriveled and dried out because they had lost all of their moisture. It was a reminder to me of the importance of rotating your food.
Next, food items can be repackaged using plastic wrap, zipper-top plastic bags, foil, Food-Saver type bags, or plastic containers. Again, these methods of packaging are more suited to items that will be rotated and used within a fairly short time frame, such as a part of your Three-Month Supply.

Thirdly, food products can be stored in glass or heavy-duty plastic containers. I am not referring to canning items - that is the next section. Using plastic or glass containers, buckets, or jars works well for items dry products that you use on a regular basis. For example, whenever I open one of my #10 cans from my Longer-Term Food Storage, I put it into a glass container so that I can see what is in there, and to keep the contents fresh while I use it up. A friend of mine does the same thing with clear, square, plastic containers. For items I use in larger quantities, such as sugar or flour, I keep them in labeled white buckets with a screw top lid. You can also use food-grade plastic buckets for storing your Longer-Term Supply, but you need to either treat them with nitrogen gas or use dry ice to displace the oxygen.
Fourth, canning food in glass containers is a great storage option. Using the Ward's pressure canner, you can bottle meats, beans, and vegetables. Always, however, make sure you use a tested recipe, and follow the directions to the letter. A great resource for canning recipes is the National Center for Home Food Preservation. They also offer a free online class that covers the basics of canning. Using a boiling water canner, you can bottle fruit and fruit products such as jams. Again, directions can be found on the NCHFP website.
Fifth, a mylar bag, also know as a "dry-pack pouch" is fabulous for packaging items for your food storage. The Ward now has a mylar bag sealer, and the pouches cost $0.35 from the Mesa Home Storage Center. (Remember, prices are subject to change as necessary.) The mylar bags hold more than a #10 can, and cost much less. They also can be stored flat, and therefore can fit in places that #10 can cannot. However, dry-pack pouches are not rodent-proof, and would need to be placed in a secondary container that is rodent-proof if rodents are a concern. You still need to use an oxygen packet with the mylar bags. To seal these bags, you must use a special, heavy-duty sealer called an impulse sealer. A vacuum packaging machine, such as the Food Saver, will not work. We are very, very fortunate to have an impulse sealer for the Ward. Please contact Rebecca Wilcox if you are interested in using it.
Lastly, #10 cans are the most common container used for Food Storage, especially for Longer-Term Supply items. The first Saturday of each month, we will have a ward canning day, and will have a #10 Can Sealer, as well as the Mylar Bag Impulse Sealer available to use. #10 cans and lids can be purchased at the Mesa Home Storage Center. The current price is $1.01 for the can and the metal lid. Remember, prices are subject to change as necessary.
Whatever storage containers you use, make sure you are regularly rotating your food storage, including your Longer-Term Supply in order to have the best quality and flavor possible.
Thursday, May 6, 2010
White Sauce Recipe
I have found that one of the hardest items to rotate for people is powdered milk.
Here is a recipe that I use a lot that can help with rotation. This is a base for soooo many sauces. I have used it twice this week already. We have had it on the board many months back, but wanted to put it on the blog for easy access.
White Sauce:
1 cup Water
3 Tb Powdered milk
1 Tb Flour (2 Tb for a medium sauce, and 4Tb for a Thick Sauce)
1/4 tsp Salt
1/8 tsp pepper
1 Tb Butter
Place water and butter in pan, and bring to a boil. Mix powdered milk, flour, salt and pepper in a small bowl. Once water is boiling add dry ingredients and whisk for one minute. Turn off heat.
Yesterday I added 1/8 tsp dry mustard, some garlic salt, and 1 cup of shredded cheese and added it to macaroni. (Simple Mac and Cheese the wholesome way)
This morning I added 1/4 tsp chicken bouillon, and put it on biscuits for biscuits and gravy. (Next time I will just cook up some sausage, mix it in and omit the chicken bouillon).
Experiment with it. You can use it (with proper flavorings) in place of any canned cream of soup. It is cheaper, and healthier. Talk about working within a budget.
Let us know what you think.
Tuesday, May 4, 2010
A Powdered Milk Primer
The Food Storage Item of the Month is powdered milk!
Did you know that there are several varieties and options for powdered milk? There is a choice between instant and non-instant, non-fat or low-fat, powdered or granulated, flavored or plain, or some combination of the above! One of the best sources I have found for ideas and information on using powdered milk is The Prudent Homemaker. She is not a fan of drinking powdered milk, and uses it for cooking and baking. Recently, a lady in Utah contacted most of the major distributors of powdered milk, and they donated cans of their products to be used as part of a large taste-test she conducted. You can read her results here.
The non-fat milk options are the most readily available. These have no fat in them, meaning that they are equivalent to "skim" milk, and are therefore more suitable for longer term storage than powdered milks that do have fat in them.
Instant Non-Fat Milk: Notice the lack of the word "powdered" in the name of this type of milk. It is not a powder, but instead more of a granule. It is by far the most widely available milk to purchase at the grocery store, Sam's Club, or Costco. The name-brand version is made by Carnation, but generic versions are available at just about any grocery store. It dissolves easily and without lumps in either hot or cold water with a ratio of 1/3 cup milk granules to 1 cup water.
Instant Non-Fat Powdered Milk: This is a true powder, and more difficult to find. The sources I have seen most often for it is Walton Feed or Provident Pantry. It readily dissolves in cold water at a ratio of 1/3 cup milk powder to 2 cups water.
Non-Instant Non-Fat Powdered Milk: This is the type of powdered milk that the Mesa Home Storage Center sells. It is more difficult to dissolve, and does best in warm water. Refrigerating it for several hours after mixing also helps. You mix it in a ratio of 3/4 cup powder to 4 cups of water. This is the type of powdered milk I use when making bread, without reconstituting it first.
Low-Fat Powdered Milk: This type of powdered milk has a shorter shelf-life than non-fat varieties due to the presence of fat in the powders. The brand that I have seen most often for low-fat types of powdered milk is Morning Moo's. Blue Chip Group (recently renamed Auguson Farms) that manufactures Morning Moo's also makes flavored varieties. Honeyville Farms also sells a low-fat powdered milk product. It is worth noting that most of the low-fat powdered milks are actually labeled "Low-fat Powdered Milk Alternative". This is because their ingredients use more than just milk, adding emulsifiers and other ingredients to create a better flavor and texture.
Sources and Additional Information:
Thursday, April 29, 2010
Butter to Oil Conversion
Oil is an important component of food storage. It improves the flavor and texture of the things you cook, and greatly increases the number of recipes you can make with your food storage. However, some of my favorite recipes call for butter, and I wanted to find a conversion ratio so that I could substitute oil when necessary.
Last week, I decided I wanted to use olive oil in my bread instead of butter. So, I used 1 cup of oil instead of 1 1/2 cups butter. (My recipe makes several very large loaves per batch.) I figured that was a good ratio, and it wasn't until that evening that I looked on the internet and was surprised by exactly how close I was to the proper ratio! Here is a chart I found. It is specific to olive oil, but should also work fairly well for canola and vegetables oils. Basically, when changing from butter to oil, it is a 4 to 3 conversion, meaning that for 4 parts of butter, you only need to use 3 parts of oil, ie: 1/4 cup butter (which is 4 tablespoons) is equal to 3 Tbsp. oil, 1 cup of butter is equal to 3/4 cup of oil; 1 1/2 cups of butter is equal to 1 cup plus 2 Tbsp. oil.
Remember, though, that this is for things like breads and muffins that are not entirely dependent on the butter for texture. Cookie recipes wouldn't work with this substitution because you have to cream together the butter and sugar in order to achieve the proper lift and texture in the final product.
Tuesday, April 27, 2010
Answering the "WH" Questions
I still remember the week my elementary school teacher spent teaching us all about the five "WH" questions, and how to answer them through critical thinking: who, what, when, where, and why. I still use these five question anytime I need to apply critical thinking in order to complete a task, solve a challenge, or finish a daunting project. I have found these "WH" questions very applicable to provident living and self reliance, especially with respect to food storage.
WHO - Who should be participating in creating food storage?
Additional counsel from Church leaders can be found in the All is Safely Gathered In pamphlet, as well as here.
WHO - Who should be participating in creating food storage?
- Everyone! The entire family needs to be involved in preparing food storage, not just those who are married, and not just women. "We encourage members world-wide to prepare for adversity in life by having a basic supply of food and water and some money in savings." - The First Presidency in All is Safely Gathered In
- "Three-month supply items are foods that you normally eat, including canned and commercially packaged foods. Longer-term supply items are basic food items like grains and beans that have very low moisture content (about 10% or less), can be stored for long periods of time (20–30 years), and would sustain life if nothing else were available to eat. A portion of longer-term supply items may be rotated into the three-month supply." - providentliving.org
- NOW! The counsel to have food storage has been given since well before the Great Depression. You will never accomplish anything if you don't start somewhere and stick with it. Remember, a journey of a thousand miles begins with a single step. However, once you take that initial step, you must keep moving forward, otherwise you won't accomplish anything more that just that first step. As counseled in All is Safely Gathered In, start by working to build a Three Month Supply, and then continue from there.
- This exact question and the answer are found at providentliving.org "Start by adding a few storable items that you typically eat, storing some water that is safe to drink, and saving some money, if only a few coins each week. Then over time, expand these initial efforts—as individual circumstances allow and where permitted—by storing a longer-term supply of basics such as grains, beans, and other staples."
- The simplest answer to this is that you should have food storage because it is a commandment. "He (Heavenly Father) has lovingly commanded us to “prepare every needful thing” (see D&C 109:8) so that, should adversity come, we can care for ourselves and our neighbors and support bishops as they care for others." - The First Presidency
Additional counsel from Church leaders can be found in the All is Safely Gathered In pamphlet, as well as here.
Thursday, April 15, 2010
Food Storage 101 Update
FYI Food storage 101 will be moved to a different date, still TBD. We will let you know ASAP.
Solar Oven Demo still on for Saturday.
Solar Oven Demo still on for Saturday.
Thursday, April 8, 2010
Upcomming Classes
There are two very exciting events that are coming up.
On Thursday April 15th we will be having a food storage 101 class. It will be starting at 7:00pm at the church. During this class we will have information on the why’s, what’s, and how to’s of long term food storage. This is not a class for relief society sisters only the whole family is invited. There will be no nursery provided so plan ahead.
Also coming up is a Solar oven demo. This will be held on April 17th at 10:00am in the church parking lot. We will have several ovens set up and working. We will also have samples and recipes. Again the whole family is invited.
We are excited to see you there! Let us know if you have any questions.
Monday, March 22, 2010
Grains Plus Order
I have received an email that could potentially be a resource for you.
There is a company that does bulk orders of grains and food storage type items. The company is called Grains Plus. My intent is not to promote them as much as it is just to let you know that this is a potential resource for you. I recommend looking into it for yourself. Check out their website www.grainsplus.com. If you are interested in purchasing from them, they are doing a bulk order right now. Orders are due the 21st of April. I have the information and can forward it on if you are interested.
Thanks for the tip Dorris.
If anyone has ordered from them and would like to post a comment that would be great!
Thursday, March 18, 2010
Canning Lemon or Orange Juice

Many people plant lemon or orange trees with the great notion of having fresh fruit. These happy thoughts quickly change once the tree has grown. Most fruit/citrus trees have such a great yield it can be very overwhelming to deal with. Many times we freeze as much as we can, and then make offers to all our friends and neighbors in attempts to rid ourselves of the excess. We recently planted a lemon tree, and I actually am excited for the high yields. Admittedly I am not excited for the work that comes along with that. This year we only had 22 lemons. I weighed them and it came out to a total of 10 lbs.
We don’t have a lot of freezer space so freezing the lemon juice wasn’t my first choice. I looked online and came across a recipe on pickyouown.org for home canning lemon juice. After giving this recipe a try, I have decided to keep it on file.
It comes to 2 cups of lemon juice per pint. We use lemon juice to make lemonade. We will post the recipe we use soon. Enjoy!
Tuesday, February 23, 2010
Burrito or Taco filling
Here is a great food storage recipe. I would imagine if you don't have refried beans you could use cooked or canned beans. (Home canned beans would be my choice)
Can't wait to try the recipe. Thank you Susi!
"I have a recipe that I use a lot that contains all cannery items, or items from food storage.
It is a burrito or taco recipe.
It makes a large batch and can be scaled down to fit a smaller family.
4-5 cans beef chunks (the size of the cannery cans)
1 jar cannery salsa
2 big handfuls of dehydrated refried beans (from the cannery)
1 handful of dehydrated onions
1 bag (8oz) cheese
Add all ingredients in to a pan, including the water from the beef chunks. It is necessary to have the water so that it can rehydrate the beans and onions. Let them all simmer till the beans and onions are rehydrated, or till all the liquid is soaked up. Add the cheese to the mix. Serve with tomatoes, lettuce and sour cream if desired.
Homemade tortilla recipe would work great with this.
This can also be refrigerated and possibly frozen to add more to the food storage."
Submitted by: Susi McCabe
Wednesday, February 17, 2010
SPRING

Earlier today I was noticing how pretty the blossoms on our peach tree are. I decided to grab my camera and attempt to capture the beauty on film. As I was snapping away, I saw a bee and thought HOORAY! pollination in process. All of this excitement reminded me that spring is here and now is a great time to plant in the garden.
May I make a few suggestions before you run down to the store to "see" what they have.
Plan ahead. Know what you want to plant. Since becoming a Certified Master Gardener, I have found their website a very valuable tool. http://cals.arizona.edu/maricopa/garden/html/pubs/press.htm Once you are on click on the right hand side where it says "download free U of A horticulture publications". Have fun with these. My favorite publication is under the Vegetables section. The pub is titled "Vegetable Planting Calendar for Maricopa County".
Start small. If you are new to gardening, keep in mind you don't have to go for the gold this season. I started with a 4x4 raised planter bed and got the bug to garden. I now have 2 4x10 raised beds. You will end up happier if you have a great crop from a small bed versus a failed crop in a too large bed.
If you are unsure ask. We have many people in the ward who are very skilled gardeners. A funny thing about gardeners; most of them love to talk about their experiences. If you have questions ask them in the comment section. If you have answers to these questions reply to them in the comments section. If you would prefer more one on one, call me. I love to talk gardening, and if I don't know the answer, I will get you in contact with someone that does.
Lastly, just have fun. Decades ago the prophet commanded us to plant a garden, this can be one of the most fun commandments to keep. The whole family can be involved, and it can really be quite rewarding.
Happy Gardening!
Saturday, February 13, 2010
Home Made Instant Oatmeal Packets
My Daughter loves and I mean LOVES oatmeal. The good news is she prefers home made versus store bought. The down is every morning I get out a pot and make 1 cup of oatmeal. I dislike having to wash a pot for such a small amount of food. I came across this recipe a while ago and decided to try it out today. I am very excited. It was simple took hardly any time, and is far less expensive than what you pay in the store for the same convenience.
This is the same recipe that was on the board several months back.
"To make individual instant packets:
In blender, blend 1/2 cups of oats until powdery.
Into each of the packets (perhaps a zip-lock style sandwich bag) combine the following ingredients:
1/4 Cup unpowdered oats
2 Tbsp powdered oats
1/8 tsp salt
1 tsp sugar (optional)
Close the top securely and store in a cool,dry place.
Microwave Directions for cooking:
Empty packet into microwavable bowl. Add 2/3 Cup water or milk. Microwave at HIGH about 1 1/2 minutes. Stir."
I opted to use a smaller food processor instead of my blender. I also left out both the sugar and salt. I don't need the extra sodium, and we add a little brown sugar to sweeten the oatmeal just a bit after it is cooked.


One of my top priorities is my families health, but life is busy. Any time I can combine healthy eating and convenience I do it. Try it and let us know what you think. Enjoy!
Tuesday, February 2, 2010
Self-Reliance
I found this on the church's website. Though it was interesting and a great reminder of the important commandment to become and live self-reliant.
Self-Reliance
Self-Reliance
Ward Canning Day
This last Saturday was our monthly Ward Canning Day. Congrats to all that were able to participate. We were able to can/bag close to 500 lbs of food!
We do not have a scheduled Ward Canning Day for February, but if you want to request the use of the Mylar bag sealer let any one of us on the committee know. In March we will be having a Ward Canning Night. It is scheduled for the 12th in the evening. More information to come.
If you are one of the lucky few who already have obtained a "year supply" and can share any ideas please do. Recipes, storage ideas, rotating ideas, all are useful.
Thursday, January 28, 2010
Home Made Tortillas
I first started making my own tortillas almost 2 years ago. It all started with a thought "If I ever have to live off my food storage alone, where would I get tortillas?" It has since evolved and I do it now for many more reasons. Mostly store bought tortillas are too dry! Plus this is a far more healthy option for my family.
I will share with you a great recipe that my sister in law gave me. I am pretty sure she did not author it, and would love to give credit where it is due, but am just not sure who it is due to. One thing I really like about this recipe is that it doesn't call for lard or shortening. I don't use lard nor store shortening so this is a perfect recipe for me.
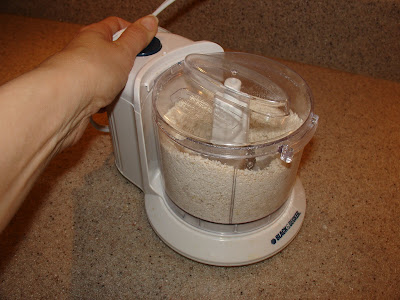
I have always used the food processor method for mixing until last night. I ventured out a bit and mixed by hand. I was honestly surprised at how easy and quick it actually was.
Whole Wheat Flour Tortillas
1 Cup unbleached or all-purpose flour
1 Cup whole wheat flour
1/2 tsp salt
1/4 Cup canola or vegetable oil (I use extra virgin olive oil)
2/3 Cup warm water
For hand mixing:
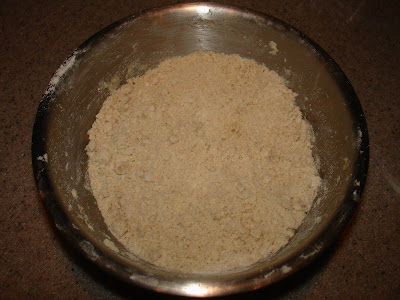
Rub flour, salt and oil together with your fingers untill completley incorporated and fine crumbs form.

I will share with you a great recipe that my sister in law gave me. I am pretty sure she did not author it, and would love to give credit where it is due, but am just not sure who it is due to. One thing I really like about this recipe is that it doesn't call for lard or shortening. I don't use lard nor store shortening so this is a perfect recipe for me.
I have always used the food processor method for mixing until last night. I ventured out a bit and mixed by hand. I was honestly surprised at how easy and quick it actually was.
Whole Wheat Flour Tortillas
1 Cup unbleached or all-purpose flour
1 Cup whole wheat flour
1/2 tsp salt
1/4 Cup canola or vegetable oil (I use extra virgin olive oil)
2/3 Cup warm water
For hand mixing:
Rub flour, salt and oil together with your fingers untill completley incorporated and fine crumbs form.

Pour water into dry ingredients and immediately work it in with a fork. Dough will be in large clumps. Sprinkle with flour and knead until smooth.

Food mixer:
Place flour and salt in bowl of food processor. Add oil and process for about 3 seconds. With machine running, pour water through feed tube in a steady stream. Let machine run until dough forms a ball. Continue to run machine another 4-6 minutes to get the dough extra smooth.
For either mixing methods:
Allow dough to rest in a bowl, covered, for at least 30 minutes before baking.
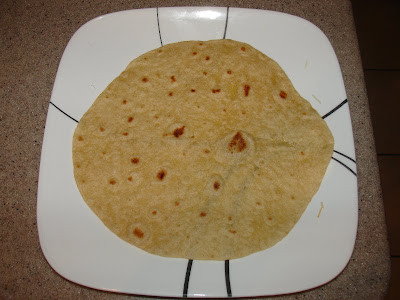
Roll out or press tortillas as flat as you would like. (I do them really thin. As thin as I can without them becoming see through) Brown in frying pan on medium-high heat for about 15-20 seconds per side. Place hot tortilla on towel and cover with another towel. (I don't do this) After each tortilla is placed in the towel, lightly spray with a water bottle to keep tortillas moist. (Or this) Makes 8-10 medium sized tortillas. (I usually get closer to eight fit in my pan size)"

I haven't mastered the circle tortilla yet, but you should have seen my first batches! Now is the time to practice.
Try it out and let us know what you think.
Stake Canning Day January 2010
Today was Stake Canning Day.
We had the opportunity to can Dry Milk, Oats, Macaroni, Dried Carrots, and Dried Apples. Yea for those who were able to make it and take advantage of the facilities we are blessed to have located so near to where we live.
Next months Stake Canning Day is February 25th. The sign up sheet is available outside of the Relief Society Room every Sunday. If you are not able to sign up and still want to participate please contact someone on the Committee. The last day to order for February is the 7th.
Items available for next month include: Black Beans, White Sugar, Fruit Drink Mix, White Beans, and Potato Flakes.
Remember the Mesa Home Storage Center (Cannery) does sell prepackaged boxes of six cans in the following items. Rice, Quick Oats, Pinto Beans, and Red Wheat. These do not need to be pre-ordered and are available for purchase anytime the Cannery is open.
Subscribe to:
Posts (Atom)